Do you looking to spice up your nail game without spending a fortune at the salon? Dotting nail art is the perfect solution for beginners and nail enthusiasts alike! This simple yet chic nail design technique allows you to create endless patterns and styles with minimal effort and tools. In the below blog post, I will guide you through easy dot nail art designs you can try at home, specifically curated for women in the USA and Canada. May be you are preparing for a night outing or want to add a pop of personality to your everyday look, these designs will have you covered!
Why Choose Dot Nail Art?
Dot nail art is versatile, easy to create and doesn’t require professional tools or advanced set of skills. With just a few basic materials, you can reach a wide range of looks—from playful polka dots to elegant floral designs. Dot nail art is also perfect for beginners of the game, because it’s always allows you to experiment with different color combinations and patterns. Meantime it’s a fun way to express your creativity and also personalize or customized your nails to match your mood or outfit!
Essential Tools and Supplies for Dot Nail Art
Before we learn about the designs, let’s make sure you have all the necessary tools and supplies. Here’s what you will need.
- Base Coat: A clear base coat to protect your nails and help the polish adhere better.
- Nail Polish Colors: Choose at least two contrasting colors for your dots and base.
- Dotting Tool: You can use a professional dotting tool, a bobby pin or a toothpick to create dots.
- Top Coat: A clear top coat to seal your design and add shine.
- Nail Polish Remover and Cotton Swabs: For cleaning up any mistakes or excess polish.
Step-by-Step Guide to Dot Nail Art Designs
Now that you have your tools ready, let’s explore some simple dot nail art designs you can create at home. These designs are beginner-friendly and will add a unique flair to your nails.
1. Classic Polka Dot Nails

Polka dots are a timeless design that never goes out of style. They’re simple to create and look great on any nail length or shape.
Steps:
- Apply a Base Coat: Start by applying a clear base coat to protect your cute nails.
- Choose Your Base Color: Apply two coats of your chosen base color and let it dry completely.
- Create Dots: Dip your dotting tool or a bobby pin into a contrasting nail polish color. Gently press the tool onto your nail to create evenly spaced dots. You can create a random pattern or a uniform grid, depending on your preference.
- Seal with a Top Coat: Once the dots are dry, then apply a top coat to seal your design and add shine.
Pro Tip: For a more playful look, use multiple colors for your dots!
2. Floral Dot Nails
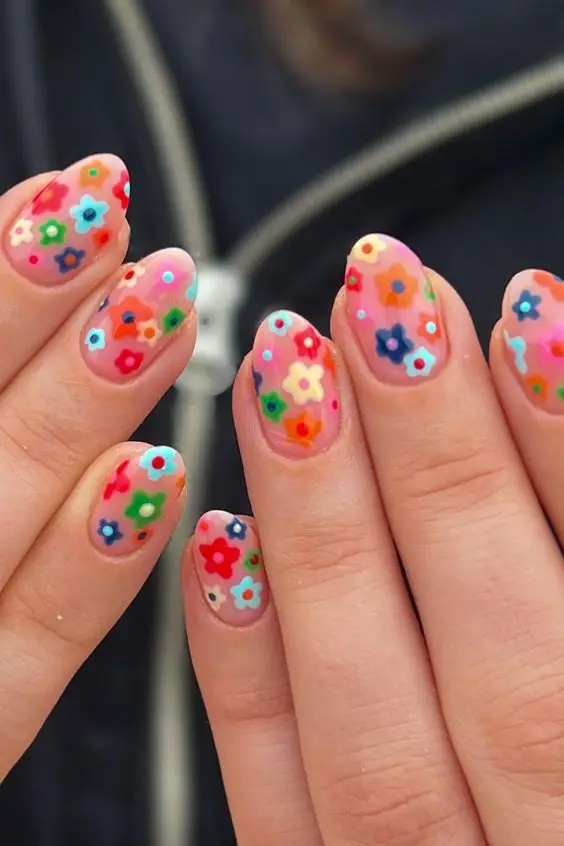
Floral dot designs are perfect for adding a touch of elegance and femininity to your nails. They’re great for spring and summer but can be worn year-round.
Steps:
- Apply a Base Coat and Base Color: Start with a base coat, then apply two coats of a light or neutral color as your base.
- Create Flower Centers: Use a bright color to make a small dot in the center of where you want your flower.
- Add Petals: Use a contrasting color to create small dots around the center dot to form petals. Repeat on each nail for a full floral look.
- Finish with a Top Coat: Let your design dry completely and seal with a top coat.
Pro Tip: Experiment with different colors for the flowers to create a garden on your nails!
3. Gradient Dot Nails
Gradient dot nails are a fantastic way to play with color and create a visually appealing effect. This design mimics an ombre effect using dots instead of a gradient brush technique.
Steps:
- Base Coat and the Base Color: Apply a base coat followed by your chosen base color.
- Create Gradient Dots: Start with a darker shade of the same color as your base and make dots near the tip of your nails. Gradually switch to a lighter shade as you move towards the base of your nails.
- Seal with Top Coat: Apply a top coat to blend the colors and protect your design.
Pro Tip: Use a makeup sponge to help blend the dots for a smoother gradient effect.
4. Heart Dot Nails

Heart dot nails are perfect for Valentine’s Day or when you are feeling a bit romantic. This design is simple but can make a bold statement.
Steps:
- Prep Your Nails: Start with a base coat and your favorite base color.
- Create Half Dots: Use a dotting tool to make two dots side by side and slightly overlapping them at the center.
- Draw the Heart: Use a toothpick to drag the sides of the dots downwards to form a heart shape.
- Top Coat Finish: Once the hearts are dry, seal with a top coat.
Pro Tip: Use red or pink for a classic romantic look, or try black or gold for an edgier vibe!
5. French Tip Dots
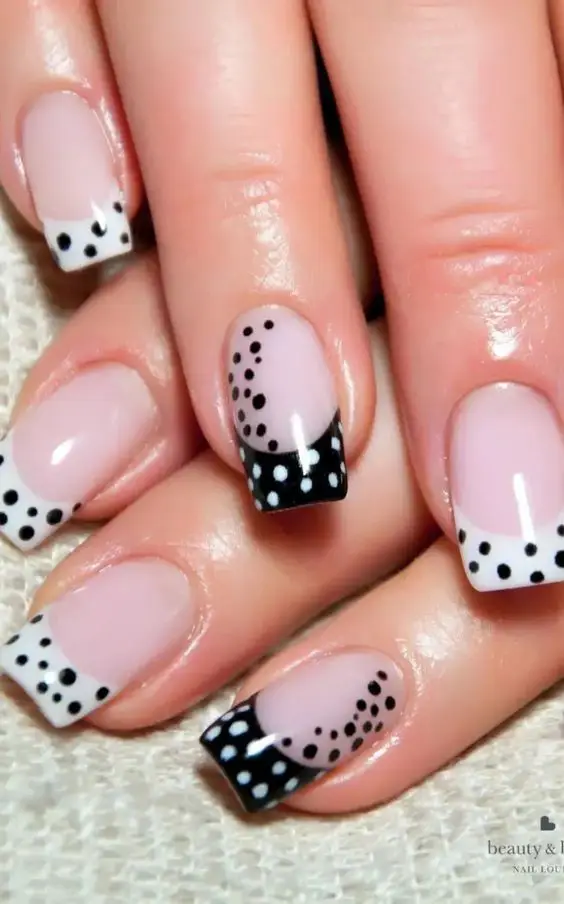
French tip dots are a modern twist on the classic French manicure. This design adds a fun, dotted edge to your nails.
Steps:
- Base Prep: Apply a base coat and a nude or clear base color.
- Add Dots Along the Tip: Choose a contrasting color and use a dotting tool to create dots along the tip of your nails, mimicking a French manicure.
- Finish with a Top Coat: Apply a top coat to protect your design and also add a glossy finish.
Pro Tip: Use metallic colors like gold or silver for a chic and sophisticated look!
6. Rainbow Dot Nails
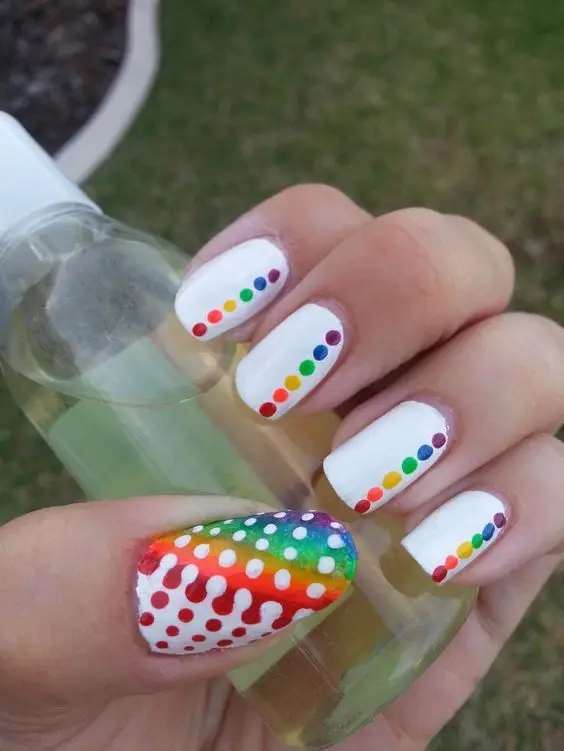
Rainbow dot nails are bright, fun, and perfect for anyone who loves a pop of color. This design is great for festivals or just adding some cheer to your day.
Steps:
- Base Coat and Color: Start with a base coat and a white or pastel color for the base.
- Create a Rainbow: Use different colors to create a rainbow pattern of dots on each nail, starting with the darkest shade at the bottom and the lightest at the top.
- Seal with Top Coat: Finish with a top coat to make the colors pop.
Pro Tip: You can use neon colors for a more vibrant look!
7. Geometric Dot Nails
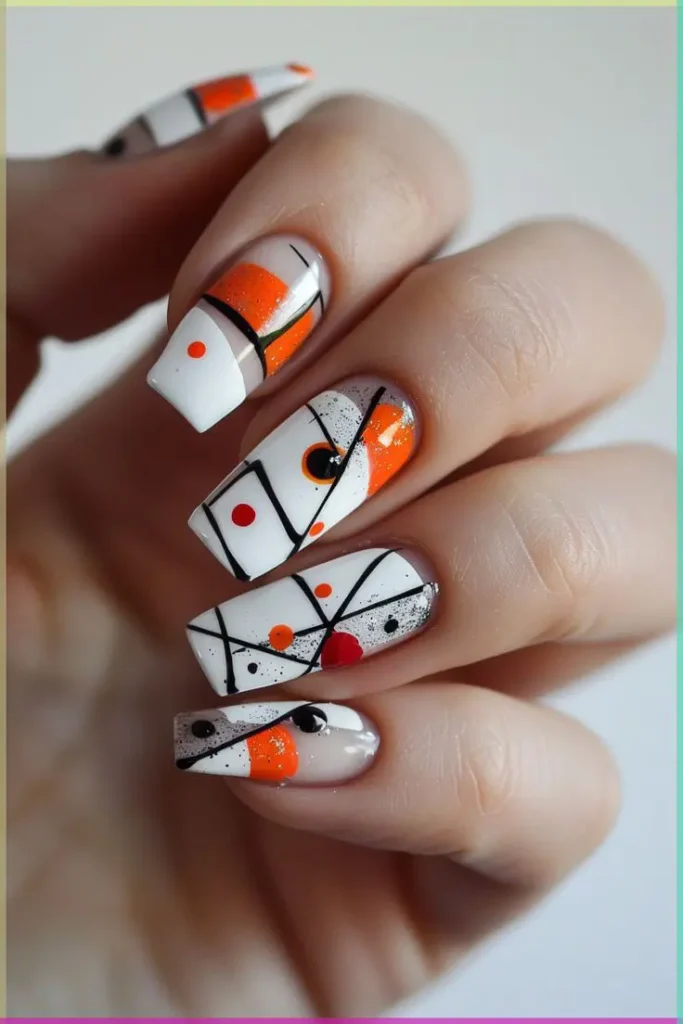
Geometric dot nails are perfect for those who love modern, abstract designs. This design involves creating structured patterns with dots.
Steps:
- Prep Your Nails: Start with a base coat and a solid base color.
- Create a Geometric Pattern: Use a dotting tool to create dots in a straight line or triangular pattern.
- Play with Colors and Shapes: Mix and match different colors and dot sizes for a unique look.
- Top Coat: Finish with a top coat to protect your design.
Pro Tip: Use metallic dots for a futuristic, geometric look!
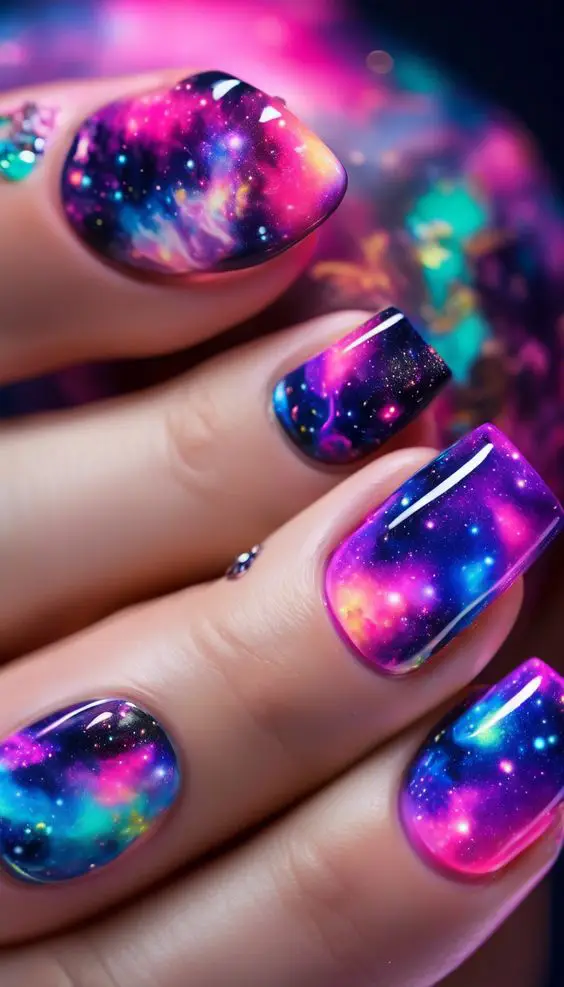
8. Galaxy Dot Nails
Galaxy nails are all the rage and you can recreate this cosmic look with dots!
Steps:
- Base Coat and Base Color: Start with a black or dark blue base color.
- Add Stars and Planets: Use white and pastel colors to create dots representing stars and planets.
- Create a Galaxy Effect: Use a toothpick to swirl the dots slightly for a cosmic effect.
- Finish with a Top Coat: Add a top coat to blend the colors and add shine.
Pro Tip: Add some glitter polish for an extra galactic sparkle!
9. Negative Space Dot Nails
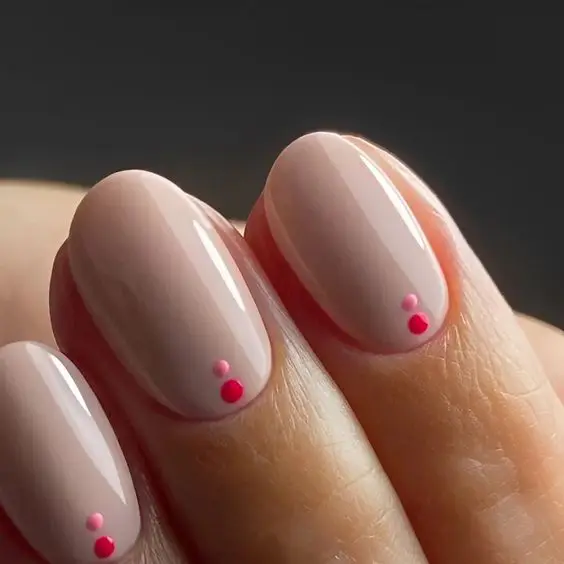
Negative space nails use the natural nail as part of the design, making them a minimalist yet stylish option.
Steps:
- Apply Base Coat: Start with a clear base coat to protect your nails.
- Create a Dot Pattern: Use a dotting tool to create a simple pattern, leaving part of your nail exposed.
- Top Coat Finish: Seal your design with a clear top coat.
Pro Tip: Try using different dot sizes for a more dynamic look!
Tips for Perfecting Your Dot Nail Art
- Use the Right Tools: Invest in a good dotting tool set or use household items like bobby pins and toothpicks.
- Practice Makes Perfect: Don’t worry if your first attempts aren’t perfect. Practice different designs and techniques to improve.
- Be Patient: Allow each layer of polish to dry completely before adding more dots or applying a top coat.
- Clean Up Edges: Use a small brush dipped in nail polish remover to clean up around your nails for a professional finish.
Conclusion
Dot nail art is an easy and fun way to express your creativity, and it’s perfect for beginners. With these simple dot nail art designs, you can achieve stunning results right from the comfort of your home. Whether you’re going for a classic polka dot look or something more daring like galaxy nails, the possibilities are endless. So grab your nail polish, get creative and show off your unique style with these dot nail art ideas!